A Hard Day’s Knight, Part 3
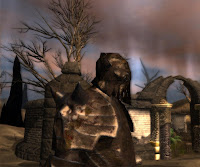
 Three weeks. That’s how long I’ve been working on this armored creature model. I estimate that the model is about eighty percent done, which for all intents and purposes means that it’s completely done. Everything else amounts to patching flaws here and there that most players probably won’t even notice in the heat of battle. Discerning players may catch these flaws if they pause the game and scrutinize the creature in various stages of animation, but I’m hoping that most won’t bother.
 When I envisioned this model, little did I realize what sort of hardships I’d undergo to create it. The entire mesh is composed of smaller meshes representing different armor parts – the breastplate, gardbrace, rerebrace, couter, tuille, and many other strange-sounding accessories that I won’t bother to list. The high-poly version of these armor parts are difficult to make because of the complex details in their design. Many of these components overlap other parts, so I have to make sure that no polygon pierces through any other polygon. This is hard enough to do when the model isn’t moving, but once it’s animated, it’s very frustrating to try to put polygons in their place.
 This brings me to another problem: Rigging a model comprised of overlapping sub-meshes is very difficult. If there is a way in 3DS Max to make some elements invisible so I can easily weight the vertices underneath, I haven’t found it. I can make the entire mesh see-through, and I can switch to wireframe mode, but these are no substitute for selectively hiding polygons while rigging.
Another problem I experienced stemmed from the animations that I recycled from NWN2. These animations have a wider range of motion than one would expect from an armored humanoid. To make use of these animations, the 3D artists at Obsidian Entertainment created armor designs that are much more articulated than real armor. Blissfully unaware of this situation, I constructed armor based on a more traditional design. I now realize that I’ve created armor that is much suppler than sheet metal has any right to be.
 This just goes to show that with only five months of experience in 3D modeling under my belt, I’m still just an amateur. On the other hand, I think I did some fairly good texture work on the armor. The metal is rusted and pitted in some parts, and it shows pretty realistically in game. Some fancy Photoshop techniques went into the making of this texture, some of which I figured out on my own. I ought to document my workflow for creating this texture before I forget it all. I hope to have it done in my next blog post.
 Because I couldn’t decide what color to paint the armor, I made it fully tintable. (Well, it’s tintable in those areas that aren’t corroded.) This will give the other members of the Shattered Dreams team a chance to make this creature as scary or silly as they want it to be.
To the actual members of the team who happen to read this blog post: Disregard the part about making the model silly. Please. This dude is meant to be seriously intimidating. If you’re not convinced, check out the picture below.
 “Look, a player character. Nab ‘em, boys.” |


Comments
Thanks for the complement. :)
@Chaos Wielder,
LOL. I guess the pink guy just doesn't get it. :D