Posts

Showing posts from April, 2012

Love Is a Many-Headed Thing, Part VIII

Image
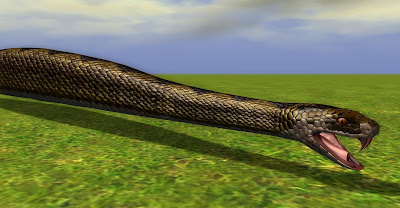
Finally, I bring you what this entire series of blog posts has been promising all along – many heads. Below is the five-headed hydra, composed of 5,576 triangles. It isn’t far from my earlier estimate of how many triangles would make it up, and it’s still less than the number of triangles that went into the blue dragon. Still, if two heads are better than one, then surely seven heads are better than five. The seven-headed hydra pictured above is composed of 7,644 triangles, much more than what the blue dragon comprises. Nevertheless, the hydra looks so much more intimidating with an extra pair of fanged mouths that surely two thousand more polygons would be a small price to pay for a boss creature like this. I won’t go beyond seven heads, though. Anything more would have a good view of its own butt. By the way, regarding what I said about this hydra not growing any new heads – I may change my mind about that. We’ll see how it goes.

Sorry, But the Snake Must Die

Image
Take a good look at the picture below. Take a good look at it because this is the last that anyone will ever see of this snake. Even before I give it the gift of life, it will die stillborn. When I wrote my last blog post, I thought I was ready to transform the snake I’ve been working on into a hydra. I was wrong. I made a shocking discovery, one that I should have realized before I started texturing the snake. I found out that my model comprised 5,628 triangles, 82% of which comes from the head and neck. If I had made a five-headed hydra out of it, the creature would have weighed in at 24,180 triangles. Just to put things into perspective, the creature with the most number of triangles in NWN2 is probably the blue dragon, which is made up of only 5,810 triangles. Any creature that goes way over this number will be a resource hog that may slow down the game. Clearly, this situation is untenable. I’m sorry, but the snake must die. Ironically, only a few weeks ago, I advised E

Love Is a Many-Headed Thing, Part VII

Image
On a trip to Australia some time last year, I went to a dry night market that catered mostly to the tourist trade. There, I came upon a stall where a man had a few small snakes for people to touch. Seeing other passersby petting some of the reptiles, I approached the stall and ran my fingers over one snake. I smiled with delight as I felt the smooth, bumpy texture of its scales under my fingers. It felt no different from a snakeskin wallet, I thought to myself. I turned to my colleague, who had accompanied me to the night market, and I asked him if he wanted to give it a go. He shook his head with such vigor that if some snakes were to land on him at that very moment, they would immediately have been flung several feet away. When I turned back to the snakes, I then espied a small sign on the stall that said, “Suggested donation: 20 dollars.” I had felt no fear while touching the snake, but the sign filled me with such apprehension that I slinked away and never went back. The hydra mo

Photoshop Tutorial: Balancing Contrast in Grayscale Images

Image
I just spent the better part of the day trying to figure out how to reduce the contrast in the red channel of my snake’s normal map. The problem was that some scales were darker than others, but I wanted them to be shaded more or less the same. Here's how the red channel of my normal map originally looked. The picture below shows what happens when the scales are not uniformly shaded. Notice that the neck is darker than the rest of the body and that there are some vertical patches of dark scales going from the neck to the middle of the snake. In addition, the lower part of the body is plunged abruptly, not gradually, into shadow. All this can be corrected by balancing the contrast among the scales. I’m sure there is more than one way to do this in Photoshop, but the method I came across is fast and reasonably effective. If I had known how to do this from the get go, I would have saved myself several hours of frustration. Before I forget my hard-earned knowledge, I’ve doc

Love Is a Many-Headed Thing, Part VI

Image
Imagine you are a tattoo artist, and a lovely magician’s assistant has asked you to do a very intricate tattoo all over her body. The problem is that the magician had cut up his lovely assistant into several pieces, but before he could put her back together, a time-traveling doctor pulled him away to help save the known universe. Despite the state of her body, the magician’s assistant is alive and well, thanks to the power of magic. Her boss will be back soon, but in the meantime, his lovely assistant insists that you tattoo her while he is away, or she’ll be too busy practicing and performing stage magic to ever have another opportunity like this. As implausible as this scenario may be, I’m faced with basically the same underlying problem in trying to texture my snake model. To accommodate the entire snake in a 1024 × 1024 texture map, I had to lay out the snake as if it had been sliced into pieces. If I were to map the surface of the snake as shown below, I’d be wasting space on t

Love Is a Many-Headed Thing, Part V

Image
I hate snakes. They look like they might be easy to model, but actually, they are not. The external form of a snake is simple enough, but the inside of its mouth has enough hills and ridges to rival the Sierra Nevada. The worst part about modeling snakes, however, is texturing them. A snake’s body is covered with scales of such precise shape and arrangement that 3D artists will notice if the texture is shoddy. Having finalized the snake’s mesh and mapped its UV, I began to make its normal map. Basically, there are two ways to do normal mapping: You can create a high-poly version of your low-poly mesh and use both to bake a normal map in your 3D modeling software. I’ve discussed how to do this in 3ds Max elsewhere in my blog . You can also bake normal maps in the latest version of ZBrush, but if any part of your low-poly mesh protrudes from the high-poly model, that area won’t be baked. In 3ds Max, you can overcome this problem by adjusting the cage in the Projection modifier. Y