Posts

Showing posts from January, 2009

What Kind of Creature Are You?

Image
Several days ago, I took a 9-question test at Quiztron called "What Magical Creature Are You?" . It's a multiple-choice personality test of sorts, but I'm certain that it has no scientific basis whatsoever. The Quiztron site lets anybody create their own test, so I think it's safe to say that nearly all of them did not originate from someone with a Ph.D. in Psychology. This particular test was apparently created by a girl who was between 13 to 17 years old when it was posted a little over a year ago. Nevertheless, the test was fun and took me less than a minute to complete. Reading the comments page , I found that possible results included dragon, elven warrior, and werewolf. Here's what I got: Demon You are dark and don't take s*** from anyone. You are a powerful creature and skilled in battle. Most fear you, but a few are on your side. Skilled in battle? I couldn't help but laugh. Nevertheless, I liked the test enough to try another one. This time,

Creature Modeling, Part 7: The Road to Completion

Image
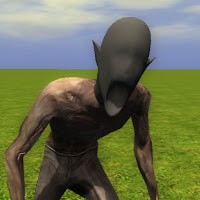
This is the conclusion of my series on building creature models for NWN2. Those who haven’t read the start of the series may want to refer to my previous blog posts. We’re almost done with our creature model, but not quite. There are still some issues to tackle, which we shall discuss in this write-up. Level of Detail You may recall that in Part 3 of this series, I mentioned that the MDB file we’ve been editing contains not one but three ghoul heads. We’ve been working on the main mesh, but there are two other meshes with fewer polygons. When the creature is shown in the game, the mesh that is used depends on the distance of the creature to the screen. Up close, the mesh with the most polygons is displayed, but as the creature’s distance to the screen increases, the mesh is substituted for one with fewer polygons. In NWN2, 3D models have at most three levels of detail (or LOD for short). The mesh with the most polygons has the same name as the MDB file. The one with fewer poly

Creature Modeling, Part 6: Painting Diffuse and Glow Maps

Image
This is a continuation of my series on building creature models for NWN2. Those who haven’t read the start of the series may want to refer to my previous blog posts. So far, we’ve created a skin mesh, rigged it to a skeleton, mapped its UVW coordinates, and given it a normal map. The color of the creature we’re modeling has been gray this whole time, however. As we shall see, adding a diffuse map to the model can make it much better looking. Subtle use of a glow map can boost its creepiness as well. Here, we discuss how to create and apply a diffuse map and a glow map to the model. Rendering the UVW Template When painting the diffuse map, you may need to start with your model’s UVW template, which shows which parts of the texture maps are rendered on which polygons. Here’s how to render the UVW template. In 3DS Max, load your model and click its Unwrap UVW modifier. Click the “Edit” button, which is under the “Parameters” rollout of the modifier. This will cause the “Edit UVWs” window

Creature Modeling, Part 5: Normal Mapping

Image
This is a continuation of my series on building creature models for NWN2. Those who haven’t read the start of the series may want to refer to my previous blog posts. Having created a UVW map for our model, we can now texture it. The NWN2 engine uses four kinds of texture maps for its models: Diffuse – Diffuse maps, along with tint maps, set the colors of an object. In the absence of a tint map, the diffuse map will completely determine what colors an object has. Normal – Normal maps are used for making low-poly objects look more high-poly. Normal maps seem to raise or lower the surface of an object like carvings on a bas relief. This is done without straining the graphics engine the way a high-poly model would. Glow – Glow maps identify what parts of an object glow and how intensely they glow. Tint – Tint maps identify which parts of an object may be tinted. Tint maps will not be discussed in this tutorial because the creature I’m making doesn’t need one. Those who want

Creature Modeling, Part 4: UVW Mapping

Image
This is a continuation of my series on building creature models for NWN2. Those who haven’t read the start of the series may want to refer to my previous blog posts. In my last blog post, I showed an overly simple way to texture a 3D model. This method is good only for quickly testing the model in the NWN2 engine. We’ll need to do better than that for in-game use, however. Before we can apply textures, though, we need to provide our model with a UVW map. This map tells graphics engines which pixels to paint over which parts of the mesh. For some humanoid heads, the mapping technique I showed in my last blog post may suffice. Nevertheless, this method is inadequate for the creature head that has been the subject of this series. The screenshot to the right illustrates the perils of improper UVW mapping. The mouth’s texture has bled into the neck of this creature. I originally applied a cylindrical UVW map, which I had explained how to do in my previous blog post. The results were disast