Creating New Life with the Expotron and Max, Part 6: Animation
This is Part 6 of my tutorial on bringing new creatures to NWN2 using 3DS Max and the Expotron. Part 1 of this series may be found here.
This blog post is an introduction to animation of NWN2 creatures. To keep the tutorial as broad as possible, I won’t cover the use of intermediate techniques that involve IK solvers. Different creatures may need different solvers to animate them properly, and it would take separate tutorials to adequately tackle each of them. Animation is a deep and complex topic that goes well beyond the mechanics of using 3D software. Readers who want to advance their animation skills may use this blog post as a starting point but should seek deeper knowledge elsewhere, especially as I’m no expert on it.
Before proceeding, you should properly weight the vertices of your creature’s meshes. I’ve already covered vertex weighting elsewhere in my blog, so read it first if you need to brush up on it.
It takes several images flashed in quick succession to create the illusion of movement in film, videos, and games. In motion pictures, the standard number of frames per second is twenty-four. When making our animation sequences in 3DS Max, we will use the default rate of thirty frames per second. Hence, a sequence lasting 1.5 seconds would consist of forty-five frames. When we export an animation sequence for NWN2, the Expotron will extrapolate seven additional frames for each frame in 3DS Max for a total of 240 frames per second. (By moving the Oversampling slider to its maximum value when we export an animation sequence, we are telling the Expotron to create eight frames for each one in 3DS Max.)
In 3D programs, instead of creating frames out of 2D images, we set the pose of our model in separate frames to represent the stages of its motion at different points in time. We don’t have to do this for all the frames in a sequence. Instead, we set the pose in a few frames that define the motion in a particular segment and let 3DS Max figure out the pose between those frames. The point where we set the model’s pose is called a key frame. In traditional 2D animation, key frames are drawn by key artists. The frames between them are drawn by assistant animators called “inbetweeners.” For our purposes, we will let 3DS Max do the inbetweening for us.
Each animation name must start with the name of the creature’s main skeleton without the “_skel” suffix, followed by an underscore. Animations that are tied to weapon stances must be followed by the code for the items wielded, followed by another underscore. All creatures must have animations for the unarmed stance. The rest of the stances are only for creatures that are capable of wielding weapons and shields. The codes for each weapon stance are shown in the following table.
This blog post is an introduction to animation of NWN2 creatures. To keep the tutorial as broad as possible, I won’t cover the use of intermediate techniques that involve IK solvers. Different creatures may need different solvers to animate them properly, and it would take separate tutorials to adequately tackle each of them. Animation is a deep and complex topic that goes well beyond the mechanics of using 3D software. Readers who want to advance their animation skills may use this blog post as a starting point but should seek deeper knowledge elsewhere, especially as I’m no expert on it.

Before proceeding, you should properly weight the vertices of your creature’s meshes. I’ve already covered vertex weighting elsewhere in my blog, so read it first if you need to brush up on it.
Basic Concepts
The technique that we will discuss here is key frame animation. An animation sequence comprises a series of frames, which are like the images in a film strip. In NWN2 as well as many other videogames, each creature has a number of animation sequences that the game engine strings together to create the illusion of continuous motion. A creature can have one sequence for walking, another for running, and a third for standing in place.It takes several images flashed in quick succession to create the illusion of movement in film, videos, and games. In motion pictures, the standard number of frames per second is twenty-four. When making our animation sequences in 3DS Max, we will use the default rate of thirty frames per second. Hence, a sequence lasting 1.5 seconds would consist of forty-five frames. When we export an animation sequence for NWN2, the Expotron will extrapolate seven additional frames for each frame in 3DS Max for a total of 240 frames per second. (By moving the Oversampling slider to its maximum value when we export an animation sequence, we are telling the Expotron to create eight frames for each one in 3DS Max.)
In 3D programs, instead of creating frames out of 2D images, we set the pose of our model in separate frames to represent the stages of its motion at different points in time. We don’t have to do this for all the frames in a sequence. Instead, we set the pose in a few frames that define the motion in a particular segment and let 3DS Max figure out the pose between those frames. The point where we set the model’s pose is called a key frame. In traditional 2D animation, key frames are drawn by key artists. The frames between them are drawn by assistant animators called “inbetweeners.” For our purposes, we will let 3DS Max do the inbetweening for us.
File Naming Conventions
The file naming conventions for animations must be strictly followed for the game engine to apply them properly. Many animation sequences are tied to the items that a creature has in its hands. For instance, the way a creature attacks with a sword in one hand and a shield in the other is different from how it attacks with a bow. Some sequences, such as spellcasting animations, are not tied to equipped items.Each animation name must start with the name of the creature’s main skeleton without the “_skel” suffix, followed by an underscore. Animations that are tied to weapon stances must be followed by the code for the items wielded, followed by another underscore. All creatures must have animations for the unarmed stance. The rest of the stances are only for creatures that are capable of wielding weapons and shields. The codes for each weapon stance are shown in the following table.
Code
|
Weapon Stance
|
1HS
|
One-handed sword
|
1HSS
|
One-handed sword and shield
|
C2H
|
Two-handed blade
|
O2HT
|
Two-handed thrusting weapon (polearms, staves, spears)
|
O2HS
|
Two-handed slashing weapon (axes)
|
D2H
|
Dual weapons, one in each hand
|
CBOW
|
Crossbow
|
BOW
|
Short bow or longbow
|
UNA
|
Unarmed
|
THRN
|
Thrown weapon (sling or dart)
|
The final part of the animation name is an identifier for the animation sequence. Standard animations must be given their correct names for the game engine to recognize them. There are many such sequences. Making them all can take weeks or even months, depending on how much time you put into animation each day. Nevertheless, there is a minimum set of sequences that you can provide a creature whose sole purpose is to engage players in combat. These animations are listed in the following table. Note that the approximate durations provided are estimates that can vary significantly with each creature and with each set of wielded items. Treat the last column in the table below as a rough guide.
Name
|
Description
|
Approx. Duration
|
idle
|
Looping animation of the creature standing in a relaxed manner
|
as long as it takes (e.g., 10 seconds)
|
walk
|
Looping animation of the creature walking
|
1 second
|
run
|
Looping animation of the creature running
|
Less than 1 second
|
idleM
|
Looping animation of the creature in a combat stance
|
3 seconds
|
fidgetM01
|
Looping animation of the creature fidgeting in combat. The starting
and ending frame should be the same as that of idleM.
|
1 second
|
1attack01
|
Looping animation of the creature making a single attack. The creature
should have delivered its deepest strike at 0.33 seconds from the start of
this sequence. The starting and ending frame should be the same as that of
idleM. If you want to make variations of this sequence, name them 1attack02,
1attack03, etc.
|
1 second
|
damage01
|
Looping animation of the creature taking damage. The attack on the creature
should reach its apex at 0.33 seconds from the start of this sequence. The
starting and ending frame should be the same as that of idleM. If you want to
make variations of this sequence, name them damage02, damage03, etc.
|
1 second
|
dodge01
|
Looping animation of the creature dodging an attack. The creature
should be farthest from the incoming attack at 0.33 seconds from the start of
this sequence. The starting and ending frame should be the same as that of
idleM. If you want to make variations of this sequence, name them dodge02, dodge03,
etc.
|
1+ seconds
|
knockdownB
|
Non-looping animation of the creature being knocked down to a lying
position. The starting frame is the same as that of the idleM animation, and
the ending frame is the same as the start of the proneB animation. The
creature should start falling within 0.33 seconds from the start of this
sequence.
|
1+ seconds
|
proneB
|
Looping animation of the creature lying on the ground. Despite the
name of this animation, not all creatures are necessarily prone. Bipeds, for
instance, lie face up as if they had been knocked out in a boxing match.
|
1 to 2 seconds
|
standupB
|
Non-looping animation of the creature standing up from a lying
position. The starting frame is the same as that of the proneB animation, and
the ending frame is the same as that of the idleM animation.
|
2+ seconds
|
death01
|
Non-looping animation of the creature taking damage and lying on the
ground dead. The starting frame is the same as that of the idleM animation.
At 0.33 seconds from the start of this sequence, the attack on the creature
should have reached its apex. By the end, the creature should be lying dead
on the ground. If you want to make variations of this sequence, name them death02,
death03, etc.
|
1+ seconds
|
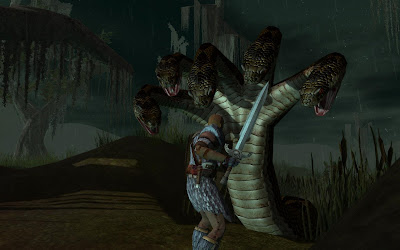
For example, the hydra creature I’m making has a skeleton named c_hydra_skel. The hydra does not use any weapons other than its fangs, so all its actions are considered unarmed. If I wanted to make one and only one animation of the hydra dodging an attack, I would name that sequence “c_hydra_una_dodge01.”
Other combat animations may be provided on a case-to-case basis. For instance, creatures capable of speech may taunt their opponents, but animals generally do not. All intelligent creatures, including animals, may attempt to intimidate their opponents, but mindless creatures such as zombies and most constructs should not be able to.
Spellcasting animations follow a different naming convention. They still start with the name of the skeleton for which they are intended (not including the suffix “_skel”), followed by an underscore. This is followed by a code for the cast animation type, an underscore, and the name of the spellcasting stage.
The following table lists the cast animation types and their descriptions.
Cast Animation
|
Description
|
GEN
|
General, all-purpose spellcasting. Not all creatures can cast spells,
but the ones that can should have this type of casting animation at the
minimum. Like the ATK animations, GEN animations may have spellcasters
hurling a spell at a target in front of them, but whether the spell is
intended to harm or heal should be ambiguous.
|
ATK
|
Attack spellcasting intended to harm opponents
|
DEF
|
Defensive spellcasting, such as spells for buffing the spellcaster
|
PTY
|
Party spellcasting, which is like doing a short ritual without having
to hurl eldritch energies at a specific target
|
MJR
|
Major, over-the-top spellcasting, powerful enough to levitate the
spellcaster a few inches off the ground
|
BSS
|
Bard song without instruments
|
BSD
|
Bard song while playing a drum
|
BSF
|
Bard song while playing a flute
|
BSL
|
Bard song while playing a lute
|
Spellcasting always comes in three stages, which are described in the following table.
Stage
|
Description
|
Duration
|
conjure
|
Non-looping animation marking the beginning of spellcasting. The
first frame is the same as that of the idleM animation, and the last frame is
the same as the first frame of the conjureloop animation.
|
1 second
|
conjureloop
|
Looping animation of the spellcaster weaving his spell
|
1 second
|
cast
|
Non-looping animation that consummates the spellcasting. The first
frame is the same as that of the conjureloop animation, and the last frame is
the same as the start of the idleM animation.
|
2 seconds
|
Hence, if I wanted my hydra to do offensive spellcasting, I would create three animation sequences named “c_hydra_atk_conjure,” “c_hydra_atk_conjureloop,” and “c_hydra_atk_cast.”
Making and Exporting an Animation Sequence
Now we come to the tutorial proper on animating a creature model and exporting its animations for NWN2. If you want to save your animations as Max files, always save them in separate files. Your rigged, non-animated model should have its own file. If, while animating your creature, you find out that some of its vertices are not properly weighted, you don’t have to start everything from scratch. Just modify the vertex weights of your non-animated model and export it again as an MDB file, overwriting the old version if you have one.
Animation in 3DS Max generally involves rotating bones. For example, to move an arm up, we rotate the upper arm on the shoulder joint. The only time we will use the Select and Move tool on a bone is when changing the position of root bones. These are the only bones that you may move. In almost all instances (or at least in all instances I can think of), we will never use the Scale tool.
At no point will we rotate or move attachment points. If you want, you can hide all attachment points when doing your animation sequences. Just remember to unhide them before exporting your animations as GR2 files.
Below are the general steps for key frame animation. I will only discuss the mechanics of the process. The art of creating lifelike animations is beyond the scope of this tutorial.
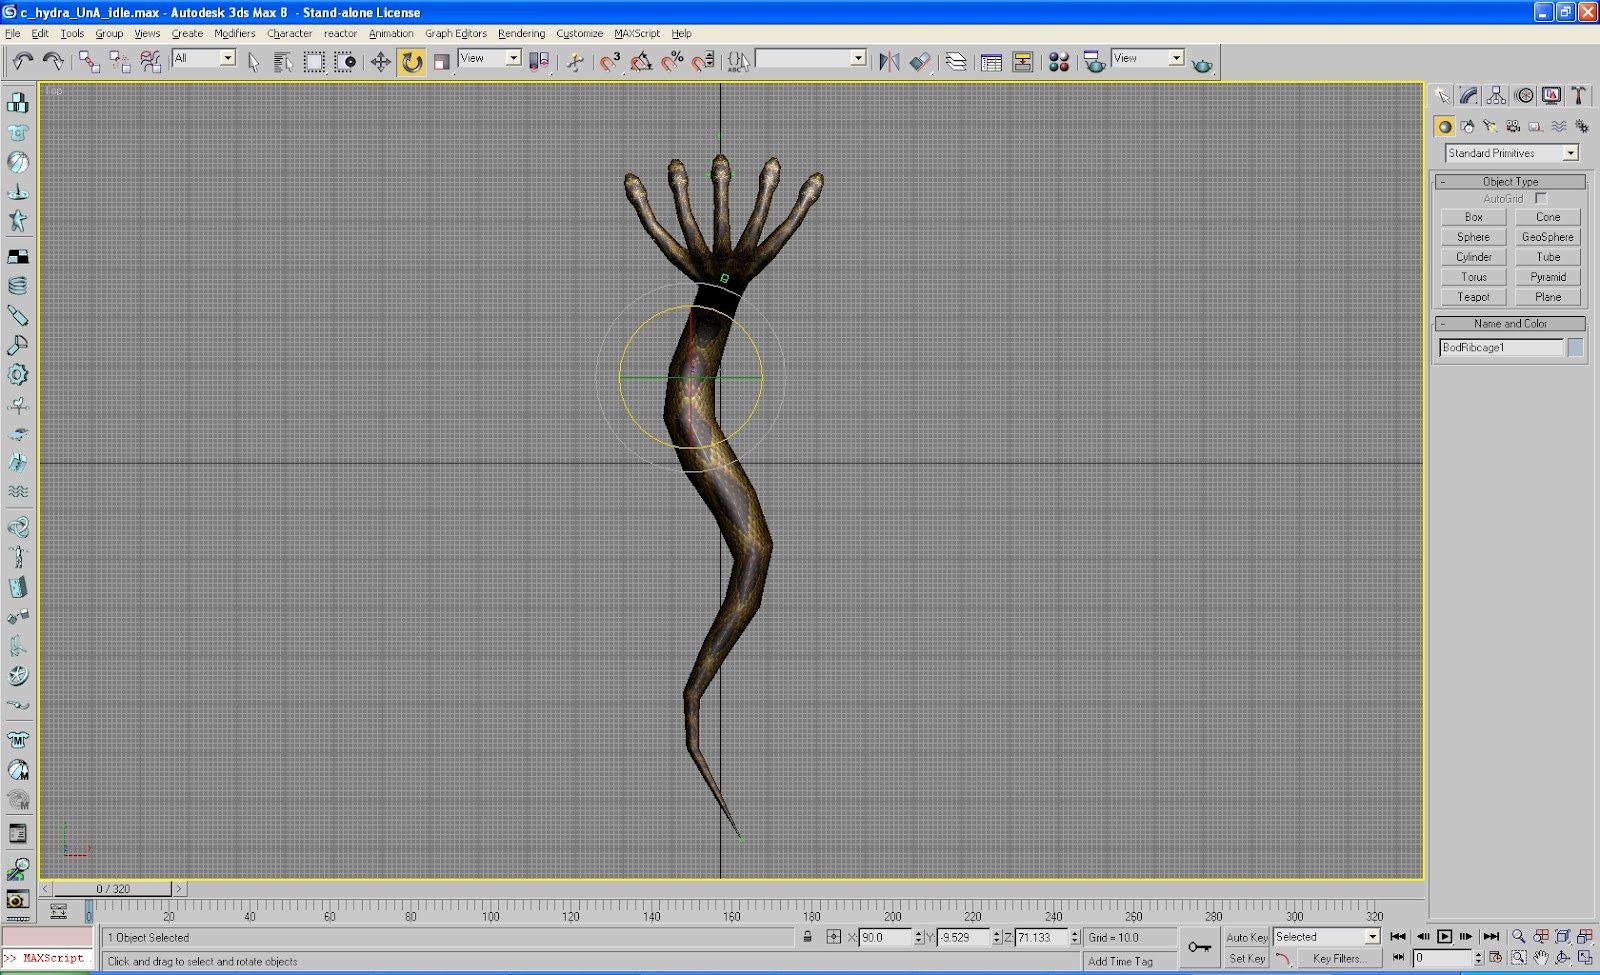
- First, we need to set the duration of our animation sequence. Click the “Time Configuration” button to bring up the “Time Configuration” dialog box.

Set the number of frames that the sequence will play then click the OK button. Remember that we are using the default rate of thirty frames per second.

- Make sure that the flame slider is at frame 0. Rotate the creature’s bones at the initial frame.

- Click the “Set Key” button. This will allow us to manually set keys on chosen frames.

Press the [H] key and select all bones. Do not include any attachment points or meshes in your selection. Click the Select button when you’re done.

- Click the “Key Filters” button and make sure that only the Rotation checkbox and optionally the “IK Parameters” checkbox are ticked. Close the dialog box when you’re done.

With the frame slider in the 0 position, click the “Set Keys” button, which has a key icon on it. Don’t confuse “Set Keys” with “Set Key,” the button of which should be red at this point, indicating that it is toggled on.

- We will now set the position of the root bones. Press the [H] button to bring up the “Select Objects” window. Select only the root bones of your creature then click the “Select” button.

- Click the “Key Filters” button again, but this time, tick the Position checkbox. Close the Key Filters dialog box.

Now click the “Set Key” button (the one with the key icon) to set the position of the root bones.

- For looping animations, you will want the last frame of your sequence to be the same as the first frame. If so, select all the bones of your creature, not including its attachment points. Hold down the [Shift] button then click the first key and drag it to the last frame. This will clone the keys in the first frame to the last frame.

- We will now set other key frames to animate the creature. Click the “Auto Key” button.

Move the frame slider to the frame you want to set a key for. Rotate bones to set the creature’s pose for that frame. You may move root bones if necessary.
- Move to a new frame and set the creature’s pose for that frame. Repeat until you’ve assigned all the key frames for your creature.

- Even if you set your key frames properly, you may find that the acceleration or deceleration of motion from one key frame to another isn’t quite right. If so, you will have to edit the curve of the motion. Select one or more bones whose motion acceleration you want to change.

Click the “Graph Editor” menu and select “Track View – Curve Editor.” This will bring up the associated window.

In the new window, you can select any set of two or more points on each line and change the curvature of the segment between those points by clicking any of the buttons on the toolbar that changes the segments’ tangents. This will affect how the rotation and position of the bones between your key frames will change.

- At any point, you may click the “Play Animation” button to see how it goes.

When you are satisfied, export your animation as a GR2 file using the method that I discussed in my last blog post.
- Create a module for testing your creature model if you haven’t done so already. If you want to test the creature’s combat animations, be sure to set its faction to Hostile. Run the game as your chosen player character and interact with the creature, carefully observing its animation as you play. If you find that the animation needs some fine-tuning, adjust it in 3DS Max then export it as a GR2 file again. Repeat as often as necessary.


Saving and Loading Animations
While you may save your animated creature in a separate Max file for each animation, you can also store your animation sequences as XAF files. These are basically XML files that are specifically designed for animations.
You can only save animations for selected bones, so if you want to store an entire animation, select all the bones of your creature (not including its attachment points). If you only want to store the animation of certain bones, select only those. Click the File menu and select “Save Animation.”

In the dialog box that appears, enter the name of the animation sequence you want to save. This may be any name you like. If you want to store only a segment of your animation, tick the checkbox labeled “Segment” and indicate the starting and ending frame to save. Click the “Save Motion” button when you’re done.


To load an animation, select the bones that you want to load an animation sequence for. You may select all the creature’s bones if you like, but you may also select only a smaller set of bones if you want the rest to remain unaffected. Click the File menu and select the “Load Animation” option.

In the dialog box that appears, choose the name of the XAF file you want to load. If you want the loaded animation to be relative to the bones’ current position and rotation, you may keep the “Relative” radio button toggled. I usually click the “Absolute” radio button. You may choose to replace the key frames with the ones in the file, or you may insert the animation at a specific frame. Click the “Load Motion” button when you are done. This will load the animation sequence for your chosen bones.


I can’t begin to express what a powerful, time-saving feature this is. For instance, opening and closing the mouths of a hydra isn’t easy because the angle of each head affects the angle of its mouth, fangs, and tongue in the open and close positions. To save me a whole lot of effort, I set the key frame for the hydra at its open-mouth position and stored the bone states for the heads, jaws, fangs, and tongues as an XAF file. I then retracted each fang and tongue and closed each mouth with mechanical precision, a process that also involved temporarily changing the angle of all the necks to get the closed-mouth position right. I then set a key frame for this position and saved the states of the same bones in a separate XAF file. When doing different animation sequences later, I could choose which heads would open their mouths and at what frames they would do so. I could also choose whether to extend their fangs and/or tongues when they open their mouths. This would have been difficult to achieve with precision if I had to do this manually each time.
There were many other animation sequences that I re-used in part, such as the hydra’s slithering motion. I’ll leave you to discover other applications of this wonderful feature in your own animations.
Conclusion
This concludes my tutorial series on creating new creature models for NWN2. The content of this entire series is equivalent to a chapter of a thick textbook, but the topics discussed herein can span many such books if they were to be discussed thoroughly. Nevertheless, I hope that this tutorial will serve as a starting point for novices who want to get into 3D modeling and animation in general and NWN2 modding in particular. I wish I had this kind of information at my fingertips when I was starting out.


Comments
And congratulations on finishing the badass Hydra!
Congrats as well -- that thing looks great. And your previous tutorials have been a godsend. A month ago I told my "boss" at my PW that I wasn't sure whether I could pull off a custom head -- now I've cranked out about fifty of them for the PW.
Question for part 6: for the combat animations I'm going to try to make, one of the guides says we're using the skeleton files (for PCs); since those won't have "props" like an actual sword to hold, do you know if there's a way to "tie" bones together, so that if I'm, say, doing a dude throwing a complicated blow like a zwerchhau, I don't have to keep putting the hands together, but make one follow the other?
Either way, thanks a ton -- this is a big help.
I'm terribly sorry, but it seems I missed your earlier comment for some reason. To be honest, I cannot answer your question with absolute certainty as I've never tried to do exactly what you're asking about. If I were you, I would look into using the IK Limb Solver and see what constraints might be appropriate to use. Solvers and constraints can be found in the Animation menu.